Machine Learning Engineer बनने का Complete Roadmap – Step by Step Guide

क्या आपको पता है कि Machine Learning Engineers इस समय में सबसे ज़्यादा paid tech professionals हैं?

इनकी average salary लगभग £100k है — जो software engineers, AI engineers, और data scientists से भी ज़्यादा है।

लेकिन ध्यान दें दोस्तों, बात सिर्फ़ salary की नहीं है।

एक Machine Learning Engineer के तौर पर आपको मिलती है:

  • Fascinating problems को हल करने का मौका
  • Cutting-edge tools के साथ प्रयोग करने का अवसर
  • दुनिया पर positive impact डालने की satisfaction

तो इस article में, मैं आपको एक clear और simple learning roadmap दूँगा जिससे आप Machine Learning Engineer बन सकते हैं। साथ ही, मैं आपको best resources भी बताऊँगा।

चलिए शुरू करते हैं! 🚀


🧮 Maths और Statistics

मैंने ये बात कई बार कही है — लेकिन अगर आप Machine Learning या पूरे Data Field में करियर बनाना चाहते हैं,
तो Maths और Statistics सबसे ज़्यादा ज़रूरी चीज़ें हैं जो आपको सीखनी चाहिए।

Technologies आती-जाती रहती हैं — जैसे Blockchain या AI,
लेकिन Mathematics सदियों से एक मूल आधार (fundamental staple) बना हुआ है।

अच्छी बात ये है कि आपको Maths Genius होने की ज़रूरत नहीं है।
मैं अपने first-hand experience से कह सकता हूँ कि Machine Learning में काम करने के लिए बस उतनी ही maths चाहिए
जितनी आपको school के आखिरी सालों या undergraduate STEM degree के पहले-दूसरे साल में सिखाई जाती है।


📘 3 Main Areas of Focus

  1. Linear Algebra (रेखीय बीजगणित)
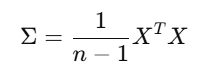
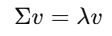
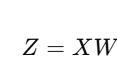
    इसमें आप matrices, eigenvalues, vectors जैसी चीज़ें सीखते हैं।
    ये concepts हर जगह इस्तेमाल होते हैं — जैसे Principal Component Analysis (PCA), TensorFlow,
    यहाँ तक कि एक dataframe भी एक तरह की matrix ही होती है।
  2. Calculus (कलन)
    इससे आप differentiation सीखते हैं — यानी कैसे gradient descent और backpropagation algorithms अंदर से काम करते हैं।
    ये हर machine learning algorithm के training और learning process में उपयोग होते हैं।
  3. Statistics (सांख्यिकी)
    इसमें आप सीखेंगे: probability, distributions, Bayesian statistics, Central Limit Theorem, और Maximum Likelihood Estimation
    इन तीनों में से Statistics सबसे ज़्यादा valuable है। अगर आप शुरुआत कर रहे हैं, तो अपना ज़्यादातर ध्यान Statistics पर ही दें।

🐍 Python

Python को Machine Learning की मुख्य भाषा माना जाता है —
कई beginners और मेरे coaching clients में मैंने देखा कि लोग हमेशा “best Python course” ढूँढते रहते हैं।

मैं दोहराऊँगा – “best” जैसा कुछ नहीं होता।
कोई भी popular Python introduction course चलेगा क्योंकि सब में लगभग वही concepts सिखाए जाते हैं।


🔑 Python Basics

  • Native Data Structuresdict, tuple, list
  • Loopsfor और while
  • Conditional Statementsif-else
  • Functions और Classes
  • Common Libraries
  • Design Patterns

🧠 Python Packages for ML

  • NumPy → Arrays के लिए numerical computing
  • Pandas → Data manipulation और analysis
  • Matplotlib → Data visualization और plotting
  • Scikit-learn → Fundamental ML algorithms implement करने के लिए
  • SciPy → General scientific computing के लिए

📚 Python Resources

  1. W3Schools Python Course
  2. Python for Everybody Specialisation
  3. Machine Learning with Python and Scikit-Learn 

🧩 SQL

एक Machine Learning Engineer के लिए SQL भी बहुत जरूरी है।
खासकर जब आप datasets बनाते हैं या feature engineering करते हैं।

मैं अपने अनुभव से कह सकता हूँ कि मैं लगभग 30–40% समय SQL में बिताता हूँ।
यानी ये बहुत ज़रूरी skill है।


📘 SQL Topics to Learn

  • SELECT * FROM, AS
  • ALTER, INSERT, CREATE, UPDATE, DELETE
  • GROUP BY, ORDER BY
  • WHERE, AND, OR, BETWEEN, IN, HAVING
  • AVG, COUNT, MIN, MAX, SUM
  • FULL JOIN, LEFT JOIN, RIGHT JOIN, INNER JOIN, UNION
  • CASE, IFF
  • DATEADD, DATEDIFF, DATEPART
  • PARTITION BY, QUALIFY, ROW()

📚 SQL Resources

  1. The Complete SQL Bootcamp: Go from Zero to Hero
  2. W3Schools SQL Tutorial
  3. TutorialsPoint SQL Tutorial

Free resources काफी हैं, इसलिए course खरीदने की ज़रूरत नहीं।
और अगर कहीं अटक जाएँ, तो ChatGPT हमेशा मदद कर सकता है। 💡


🤖 Machine Learning

Machine Learning Engineer बनने के लिए ML algorithms सीखना बेहद जरूरी है।
ये roadmap का fun part है और ज्यादातर लोग इसी कारण इस field में आते हैं।

सच कहूँ तो, इन algorithms को सीखना हमेशा fun नहीं होता।
थोड़ा mental effort और समय लगता है, लेकिन धीरे-धीरे सब समझ में आ जाएगा और मेहनत worth it होगी।


🔑 Key Algorithms और Concepts

  • Linear, Logistic और Polynomial Regression
  • Generalised Linear Models (GLM) और Generalised Additive Models (GAM)
  • Decision Trees, Random Forests, Gradient-Boosted Trees
  • Support Vector Machines (SVM)
  • K-Means और K-Nearest Neighbour Clustering
  • Feature Engineering (categorical features)
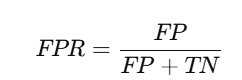
  • Evaluation Metrics
  • Regularisation, Bias vs Variance Tradeoff, Cross-Validation
  • Gradient Descent और Backpropagation

📚 ML Resources

  1. Machine Learning Specialisation by Andrew Ng → Best starter course
  2. The Hundred-Page ML Book → Concise और practical
  3. Hands-On ML with Scikit-Learn, Keras, and TensorFlow → Entry/mid-level ML engineers के लिए complete guide

🧠 Deep Learning

Fundamental ML algorithms ही career में सबसे ज़्यादा काम आते हैं।
लेकिन Deep Learning important है:

  • NLP (Natural Language Processing)
  • Computer Vision

Areas to Study

  • Neural Networks → ML की foundation
  • Convolutional Neural Networks (CNNs) → Image detection
  • Recurrent Neural Networks (RNNs) → Time series और NLP
  • Transformers → Current state-of-the-art

Resources

  • Deep Learning Specialization by Andrew Ng
  • Neural Networks: Zero to Hero (YouTube) → Andrej Karpathy
  • Deep Learning (Adaptive Computation and ML series) → Yoshua Bengio

🛠 Software Engineering

Machine Learning Engineer बनने के लिए software engineering fundamentals जानना जरूरी है।

Areas

  1. Data Structures & Algorithms → Arrays, Linked Lists, Queues, Sorting, Binary Search, Trees, Hashing, Graphs
  2. System Design → Networking, APIs, Caching, Proxies, Storage
  3. Production Code → Typing, Linting, Testing, DRY, KISS, YAGNI
  4. APIs → ML models को API endpoints के रूप में serve करना

☁️ MLOps

Jupyter Notebook में model का business value नहीं है।
आपको deploy करना सीखना होगा।

Learn

  • Cloud → AWS, GCP, Azure
  • Containerisation → Docker, Kubernetes
  • Version Control → Git, GitHub
  • Shell/Terminal →

Introduction to Python

6. Writing and Executing First Python Program

Python सीखने का सबसे अच्छा तरीका है कि आप तुरंत अपना पहला प्रोग्राम लिखें और run करें। यह chapter step-by-step आपको पहला Python program बनाने और execute करने की प्रक्रिया सिखाएगा।


6.1 Python Program लिखना

Python program एक text file होती है जिसका extension .py होता है।
Example (Hello World Program):

# पहला Python प्रोग्राम
print("Hello, World!")

6.2 Python Program Execute करने के तरीके

(a) Using Python IDLE

  1. Python install करने के बाद IDLE open करें।
  2. Shell window में लिखें: print("Hello, Python!") और Enter दबाएँ → output मिलेगा।
  3. File → New File → code लिखें → Save as program.py → Run → Run Module (F5)।

(b) Using Command Prompt / Terminal

  1. Program को किसी text editor (Notepad, VS Code आदि) में लिखें और save करें, जैसे hello.py
  2. Command Prompt (Windows) या Terminal (Linux/Mac) open करें।
  3. File location पर जाएँ और type करें: python hello.py Output: Hello, World!

(c) Using Jupyter Notebook

  1. Anaconda या pip से Jupyter install करें। pip install notebook jupyter notebook
  2. Browser में notebook open होगा।
  3. Cell में code लिखें और Run करें: print("Hello, Jupyter!")

6.3 Inline Execution (Interactive Mode)

Python interpreter को सीधे run करके भी code लिखा जा सकता है।

python

फिर लिखें:

>>> print("Hello, Interactive Mode!")
Hello, Interactive Mode!

6.4 Example Programs

Example 1: Two Numbers Add करना

a = 10
b = 20
print("Sum =", a + b)

Output:

Sum = 30

Example 2: User Input लेना

name = input("Enter your name: ")
print("Welcome,", name)

Output:

Enter your name: Anand
Welcome, Anand

📌 Quick Note for Students:

  • हमेशा program को .py extension से save करें।
  • Beginners के लिए सबसे आसान तरीका है कि IDLE या VS Code से program run करें।
  • Execution के दौरान error आने पर error message ध्यान से पढ़ें – वही debugging की पहली step है।

ROC-AUC Curve

जब हम binary classification करते हैं (जैसे spam/not-spam, disease/healthy), तो हमें सिर्फ accuracy से model की गुणवत्ता नहीं पता चलती। ऐसे में ROC-AUC Curve model के prediction scores को analyze करने में मदद करता है।


🔶 ROC का अर्थ:

ROC = Receiver Operating Characteristic
यह एक graphical plot है जो बताता है कि model कैसे विभिन्न thresholds पर perform करता है।

📈 ROC Curve Plot:

  • X-axis → False Positive Rate (FPR)
  • Y-axis → True Positive Rate (TPR)

Threshold को 0 से 1 तक vary करते हुए हम विभिन्न FPR और TPR को plot करते हैं — और वो बनाता है ROC curve.


📐 Formulae:

✅ True Positive Rate (TPR) aka Recall:

✅ False Positive Rate (FPR):


🔷 AUC का अर्थ:

AUC = Area Under the Curve
यह ROC curve के नीचे आने वाले क्षेत्र का मान है।
AUC का मान 0 और 1 के बीच होता है:

AUC ScoreMeaning
1.0Perfect model
0.9 – 1.0Excellent
0.8 – 0.9Good
0.7 – 0.8Fair
0.5Random guess (no skill)
< 0.5Worse than random (bad model)

✅ Python Code (Scikit-learn + Visualization):

from sklearn.datasets import make_classification
from sklearn.linear_model import LogisticRegression
from sklearn.metrics import roc_curve, auc
import matplotlib.pyplot as plt

# Sample data
X, y = make_classification(n_samples=1000, n_classes=2, n_informative=3)

# Train model
model = LogisticRegression()
model.fit(X, y)

# Get predicted probabilities
y_scores = model.predict_proba(X)[:, 1]

# Compute FPR, TPR
fpr, tpr, thresholds = roc_curve(y, y_scores)

# Compute AUC
roc_auc = auc(fpr, tpr)

# Plot
plt.figure(figsize=(8,6))
plt.plot(fpr, tpr, label=f'ROC Curve (AUC = {roc_auc:.2f})')
plt.plot([0, 1], [0, 1], 'k--', label='Random Guess')
plt.xlabel('False Positive Rate')
plt.ylabel('True Positive Rate')
plt.title('ROC-AUC Curve')
plt.legend()
plt.grid(True)
plt.show()

📊 ROC vs Precision-Recall Curve:


Title Page Separator Site title

FeatureROC CurvePrecision-Recall Curve
Focuses onAll classes (balanced data)Positive class (imbalanced data)
X-axisFalse Positive RateRecall
Y-axisTrue Positive Rate (Recall)Precision

✅ Imbalanced datasets पर Precision-Recall Curve ज़्यादा informative हो सकता है।


📄 Summary Table:

ConceptDescription
ROC CurveTPR vs FPR plot for various thresholds
AUCROC Curve के नीचे का क्षेत्र
Best CaseAUC = 1.0 (Perfect classifier)
Worst CaseAUC = 0.5 (Random guessing)
Use CasesBinary classification performance check

📝 Practice Questions:

  1. ROC Curve में X और Y axes क्या दर्शाते हैं?
  2. AUC का score किस range में होता है और उसका क्या मतलब है?
  3. ROC और Precision-Recall Curve में क्या अंतर है?
  4. ROC curve कैसे बनता है?
  5. क्या AUC metric imbalanced datasets के लिए reliable है?

Agent, Environment, Reward

Reinforcement Learning (RL) में एक एजेंट को एक वातावरण (Environment) में रखा जाता है।
वो किसी स्थिति (State) में होता है, वहाँ से एक Action लेता है, और बदले में उसे Reward मिलता है।

सोचिए एक रोबोट का, जो maze से बाहर निकलने की कोशिश कर रहा है — उसे सही रास्ता सीखने के लिए कई बार try करना होगा।


🔑 Key Concepts:

Termअर्थ (Meaning)
Agentवह learner या decision-maker जो actions लेता है
Environmentबाहरी दुनिया जिससे agent interact करता है
State (S)उस समय की स्थिति जहाँ agent है
Action (A)agent द्वारा उठाया गया कदम या फैसला
Reward (R)किसी action पर environment द्वारा दिया गया feedback
Policy (π)Agent का strategy, जो बताती है किस state में कौनसा action लेना है
Value (V)किसी स्थिति में मिलने वाले भविष्य के rewards का अनुमान
Episodeशुरू से लेकर एक goal तक का पूरा sequence

🔄 Agent-Environment Loop:

यह एक continuous feedback loop होता है:

(State s_t) --[action a_t]--> (Environment) --[Reward r_t, next state s_{t+1}]--> (Agent)

Diagram:

+-----------+        action a_t         +-------------+
| | -----------------------> | |
| AGENT | | ENVIRONMENT |
| | <----------------------- | |
+-----------+ r_t, s_{t+1} +-------------+

🧠 उद्देश्य:

Agent का लक्ष्य होता है:

Maximum cumulative reward (return) प्राप्त करना

Return:

जहाँ

  • γ: Discount Factor (0 < γ ≤ 1)
  • Future rewards की importance को नियंत्रित करता है

🎮 उदाहरण:

ProblemAgentEnvironmentReward
गेम खेलना (e.g. Chess)Chess AIChess boardजीतने पर +1, हारने पर -1
Self-driving carCar controllerसड़क और ट्रैफिकटकराने पर -ve, सही चलने पर +ve
Robo-navigationRobotMaze/GridExit मिलने पर +10

🧮 Formal Definition (Markov Decision Process – MDP):

Reinforcement Learning को formal रूप में एक MDP से दर्शाया जा सकता है: MDP=(S,A,P,R,γ)

जहाँ:

  • S: States का सेट
  • A: Actions का सेट
  • P: Transition probabilities
  • R: Reward function
  • γ: Discount factor

✅ Python Code Example (Gym Environment):

import gym

# Environment
env = gym.make("CartPole-v1")
state = env.reset()

for _ in range(10):
env.render()
action = env.action_space.sample() # Random action
next_state, reward, done, info = env.step(action)
print("Reward:", reward)
if done:
break

env.close()

🎯 Summary Table:

TermDescription
AgentDecision-maker (e.g., robot, AI model)
EnvironmentExternal system (e.g., game, world)
StateCurrent situation or context
ActionAgent का निर्णय या प्रयास
Rewardपर्यावरण का response, जो सीखने में मदद करता
Policyनियम जो बताता है क्या करना है
GoalTotal reward को maximize करना

📝 Practice Questions:

  1. Reinforcement Learning में Agent और Environment क्या भूमिका निभाते हैं?
  2. Reward और Return में क्या अंतर है?
  3. Discount factor (γ\gammaγ) क्या है और इसका महत्व क्या है?
  4. RL में Policy और Value function का क्या कार्य होता है?
  5. कोई real-life उदाहरण दीजिए जहाँ RL model प्रयोग हो सकता है।

PCA – Principal Component Analysis

PCA (Principal Component Analysis) एक statistical technique है जो high-dimensional data को कम dimensions में project करके उसका meaningful structure retain करती है।

उदाहरण के लिए:
अगर आपके पास 100 features हैं, लेकिन असल में केवल 2 features पूरे pattern को explain कर सकते हैं — तो PCA उन्हीं 2 को चुनता है।


🔶 उद्देश्य:

  • Features की संख्या को घटाना (Dimensionality Reduction)
  • Data में मौजूद variance को अधिकतम बनाए रखना
  • Visualization को आसान बनाना
  • Noise को घटाना और Model को Fast बनाना

📐 Core Idea (Mathematical):

PCA का लक्ष्य होता है:

ऐसे नए axes (Principal Components) खोजना जो original data में सबसे अधिक variance को capture करें।

🎯 Objective:

जहाँ:

  • X: Centered data matrix
  • W: Projection matrix (eigenvectors)
  • Z: Projected data (principal components)

🧮 Step-by-Step Working:

Standardize the Data
(mean = 0, std = 1)

Covariance Matrix Calculate करो

Eigenvalues और Eigenvectors निकालो

Top-k Eigenvectors को चुनो (सबसे बड़ी eigenvalues वाले)

Data को Project करो new space में:


✅ Python Code (Sklearn + Visualization):

from sklearn.decomposition import PCA
from sklearn.datasets import load_iris
import matplotlib.pyplot as plt

# Load sample data
data = load_iris()
X = data.data
y = data.target

# PCA with 2 components
pca = PCA(n_components=2)
X_pca = pca.fit_transform(X)

# Plot
plt.figure(figsize=(8,6))
plt.scatter(X_pca[:,0], X_pca[:,1], c=y, cmap='viridis')
plt.xlabel("Principal Component 1")
plt.ylabel("Principal Component 2")
plt.title("PCA: Iris Dataset")
plt.grid(True)
plt.show()

📊 Explained Variance:

PCA बताता है कि हर component कितना information retain करता है:

print(pca.explained_variance_ratio_)

उदाहरण Output:

[0.9246, 0.0530] → यानी कुल 97.76% variance केवल 2 components से explain हो गया

🔎 कब इस्तेमाल करें PCA?

Caseउपयोग
बहुत सारे features हों
Model slow या overfit कर रहा हो
Feature correlation ज़्यादा हो
Features sparse हों (जैसे TF-IDF)

⚠️ Limitations:

LimitationExplanation
Interpretability कम हो जाती हैPCs original features से अलग होते हैं
केवल linear patterns detect करता हैComplex nonlinear pattern नहीं देख सकता
Scaling आवश्यक हैबिना scaling result गलत हो सकता है

📊 Summary Table:

FeaturePCA
TypeDimensionality Reduction
PreservesMaximum Variance
Based OnEigenvalues & Eigenvectors
Suitable ForHigh-dimensional, numeric data
OutputReduced dimension components

📝 Practice Questions:

  1. PCA का उद्देश्य क्या होता है?
  2. Covariance matrix किस लिए बनाई जाती है?
  3. Eigenvectors और Eigenvalues का क्या अर्थ है PCA में?
  4. Explained Variance Ratio क्या दर्शाता है?
  5. PCA कब काम नहीं करता?