(क्रमिक डेटा और समय-श्रृंखला)
🔶 1. Sequence Data क्या होता है?
📌 परिभाषा:
Sequence Data ऐसा data होता है जिसमें values का क्रम (order) मायने रखता है।
हर एक input पिछले inputs पर निर्भर हो सकता है।
📍 Examples:
- एक वाक्य के शब्द (sentence)
- संगीत के सुर
- मौसम के data में तापमान
- किसी ग्राहक का खरीद इतिहास
🔁 “Sequence” का अर्थ है — ordered और dependent items.
🔶 2. Time-Series Data क्या होता है?
📌 परिभाषा:
Time-Series एक special type का sequence data है जिसमें observations समय के अनुसार क्रमबद्ध होते हैं।
📍 Examples:
- Stock prices per day/hour
- Temperature per minute
- Website traffic per week
- Electricity usage per second
🔁 इसमें समय (time stamp) बहुत ही महत्वपूर्ण होता है।
📊 3. Sequence vs Time-Series: Difference
| Feature | Sequence Data | Time-Series Data |
|---|---|---|
| Order | Important | Important |
| Time Interval | Optional | Must be fixed or known |
| Examples | Text, DNA, events | Temperature, stock, traffic |
| Goal | Next item prediction, labeling | Forecasting, anomaly detection |
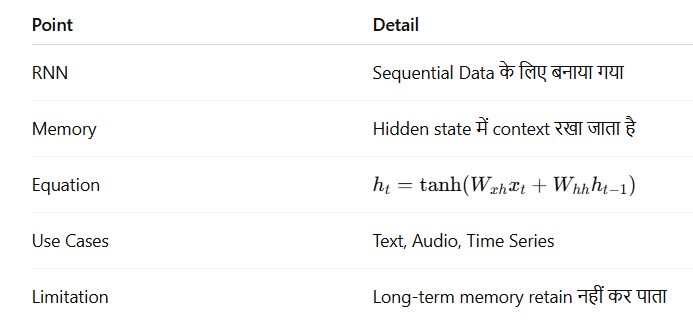
🧠 4. Why RNN is Good for Sequence/Time-Series?
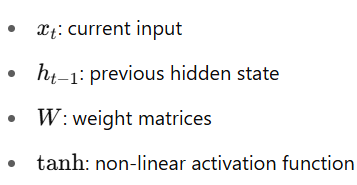
RNN एक ऐसा neural network है जो past context को memory में रखता है और next output को प्रभावित करता है।
✅ It remembers
✅ It learns from history
✅ It handles variable-length input
🔄 5. Use Cases of Sequence and Time-Series with RNNs:
| Use Case | Description |
|---|---|
| Language Modeling | Next word prediction |
| Sentiment Analysis | Text को classify करना |
| Stock Price Prediction | Future price estimation |
| Weather Forecasting | Future temperature/humidity |
| Machine Translation | Sequence to sequence conversion |
| Activity Detection | Sensor-based human activity detection |
🔧 6. PyTorch Example: RNN for Time-Series Input
import torch
import torch.nn as nn

rnn = nn.RNN(input_size=1, hidden_size=20, num_layers=1, batch_first=True)

# Input: batch of 5 samples, each with 10 timesteps, each step has 1 feature
input = torch.randn(5, 10, 1)
h0 = torch.zeros(1, 5, 20)

output, hn = rnn(input, h0)
print(output.shape)  # → [5, 10, 20]
🔁 7. Time-Series Forecasting Flow:
Past Inputs (x₁, x₂, ..., xₜ)
       ↓
   RNN Model
       ↓
Predicted Output (xₜ₊₁)
Optionally: Use sliding window for training
Example: Use past 10 days’ stock prices to predict the 11th
📈 8. Time-Series Challenges:
| Challenge | Description |
|---|---|
| Trend | Long-term increase or decrease |
| Seasonality | Repeating patterns (e.g. daily, yearly) |
| Noise | Random fluctuations |
| Missing Data | Gaps in time |
| Non-Stationarity | Changing mean/variance over time |
RNNs, LSTMs, and GRUs are commonly used to handle these!
📝 Practice Questions:
- Sequence data और time-series data में क्या अंतर है?
- Time-series को predict करने के लिए RNN क्यों उपयुक्त है?
- Time-series data में कौन-कौन सी समस्याएं आती हैं?
- Sliding window क्या होता है?
- PyTorch में time-series data को कैसे format करते हैं?
🎯 Summary:
| Concept | Explanation |
|---|---|
| Sequence Data | Ordered, context-dependent data |
| Time-Series | Temporal, time-dependent data |
| RNN | Learns from previous steps |
| Use Cases | Text, sensor, finance, environment |
| Challenges | Trends, seasonality, missing data |